I am so glad to be back at my blog. It's been an intense last few months with lots of personal stuff going on, but now I'm ready to settle back down... a little!
I've been continuing to experiment with pocket pages. I am fascinated by the ways in which they make scrapbooking feel "do-able" to people who have not ever scrapped, and they make completing a project feel "do-able" to people who have unfinished scrapbooks that have been sitting around. On the other hand, for someone like me who has been doing elaborate layouts for many years, pocket scrapping can feel constraining. I have learned (with the help of many online folks) that I have to treat a pocket page protector as another supply rather than as the definition of my layout. I can attach embellishments, photos, journalling cards - whatever - to the outside as well as the inside. I can cut pockets, combine pockets, not use pockets... My layout still is my creation, not the creation of the pocket page protector. Big lesson for me. I am teaching and coaching people using pocket pages, so I'm trying to pay attention to my own process to help me develop insights that might be helpful to others.
I'm creating a scrapbook using pocket pages to document my cake decorating hobby. This week I created a two-page spread documenting cupcakes I made back in 2010 for a new baby meet-and-greet.
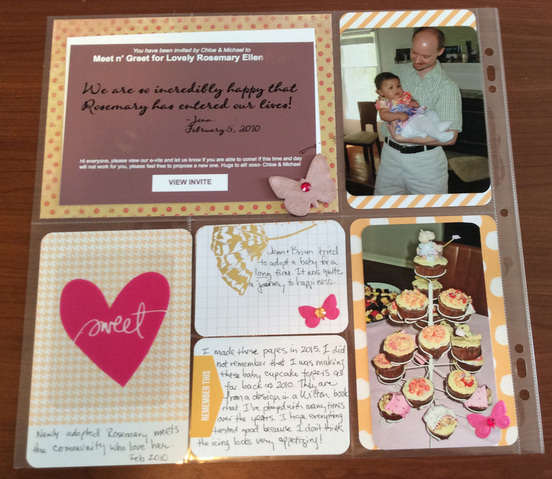
This is, I believe, Becky Higgins Design A. I put a printout of the original Evite invitation in the upper left corner, printing it in the original colors. It covers a 4"x6" vertical pocket and 2 3"x4" horizontal pockets. It is adhered on top of the page protector. I've matted it and mounted it on a piece of yellow/orange card stock, taking the colors from the cupcake icing. For accents I'm using pink, also from the icing and from the baby's clothing. You can see that I've mounted an acetate pink heart over the yellow/orange vertical card on the lower left. The photos on the right could have been the full size of the pockets, but I really wanted a sense of a background paper for the layout to pull it together. I'm using orange and white designs from Project Life's Midnight kit.
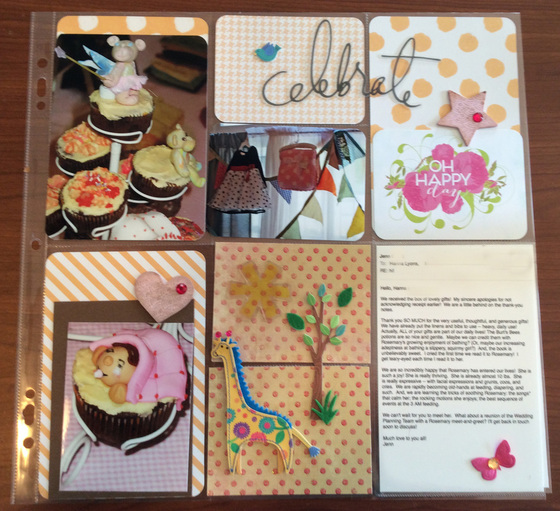
This is the right side of the spread. I also have cropped photos to show at least a little orange and white behind them, in most cases. "Celebrate" is a vinyl word from Heidi Swapp. The cards are inside the pockets but the word "celebrate" is on the outside. The wood accents, small paper butterflies and gems are from SEI's Neon Vibe kit and they are all outside the pockets. The felt giraffe is an old embellishment I've had waiting for the right page for many years and it's on top of the cards I've cut from the same card stock I used in the upper left corner of the left page. The acetate star that I'm using as a sun is also Heidi Swapp. I chose to print out on cardstock a long email from the baby's mom. It took two pages of the 4"x6" vertical pocket, so I put the second page inside the pocket and the first page I used to try out my new Fuse tool for the first time!
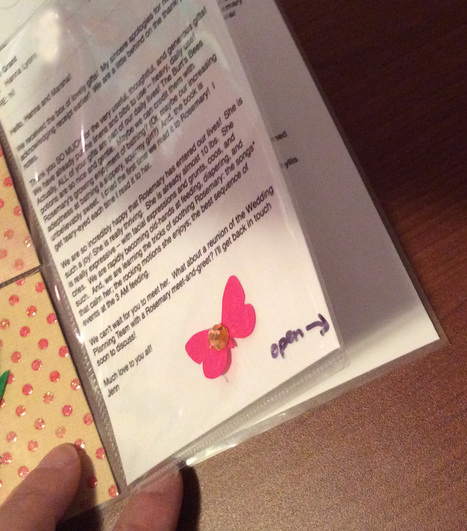
I loved the Fuse tool. For years I have spent time making little hinges, or using my sewing machine, or cutting apart other page protectors to make pockets to add to pages and so on. The Fuse tool took only a few seconds and worked great! The only thing was the ruler - it did not work for me, on this layout at least. This waterfall pocket had to be lined up very carefully so it would open easily and be directly over the email segment inside the pocket. After trying the metal ruler, lining it up felt like more work than I wanted to put into it. So I put the ruler aside, lined up the waterfall pocket with the card stock inside, and just ran the fuse tool down freehand. It came out perfectly. I added my "open" arrow afterwards, so it doesn't show up in the other photos of these pages.
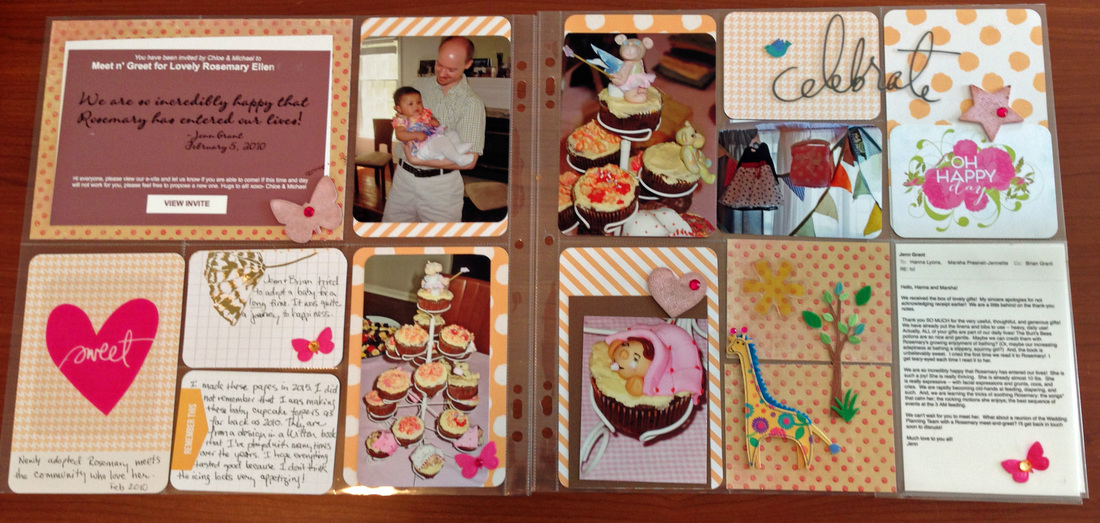
This is the final spread. You can see that I've pulled the orange and white across the spread, with pink accents. I've done hand journaling as well as included the printed email. I have wood, paper and felt accents to provide texture. I left the orange/yellow yardstick with square corners and rounded the other corners; in retrospect I might have preferred to round all the corners.
So - did this layout take less time and effort than would have been true if I did a traditional paper layout? I think so, to be honest about it. And if I did a traditional paper layout, it would not have been a grid. OK - I think I have to take these same pictures and see what I would do for a traditional paper layout.
More than anything, I love that I have added this event to my cake decorating scrapbook. It brings back all my feelings of love for this child, her parents, and the larger family I am so lucky to be a part of.
Thanks for looking and reading! Please leave a comment.

 RSS Feed
